My love of origami and paper folding started very young, and was tied into my love of aircraft and, by association, making paper airplanes. Paper folding in general was fascinating and magical, but it was paper planes that made the idea exciting and had me practising my folding fingers on the most regular basis.
This particular airplane design, The Gnat, was a crucial part of my childhood with paper planes, and is still one of my favourite models to play with when the opportunity arises.

It’s a simple model, one that most children will learn with ease and joy once they see the results. For all children, small and ancient, I highly recommend you follow the steps below and rediscover some of your sense of play.

Best Paper for The Gnat Paper Airplane
As a kid, I most often folded The Gnat from school notebook paper. The model works best with paper that’s light and pliable, and not too glossy. Copy paper will work but will not give you the best flying results.
As far as the size and shape of the paper is concerned, the model is flexible enough to work with a wide range of rectangular proportions, but something shorter like a diary or notebook will generally work better than something very tall like a foolscap sheet.
If you’re starting with square origami paper, for colourful results, I found cutting off 1/4th of the width of the square, as shown above, leaves you with a good size rectangle to play with.
Gnat Paper Plane Instructions
Step 1

Fold the rectangle in half along its length and open it out again.
Step 2

Fold down the halves of the top short edge along a diagonal, towards the central crease, to form a sharp point at the top of the sheet.
Step 3

Creasing along the base of the broad triangle formed in the previous step, fold the pointed end down along the central fold of the model.
Step 4

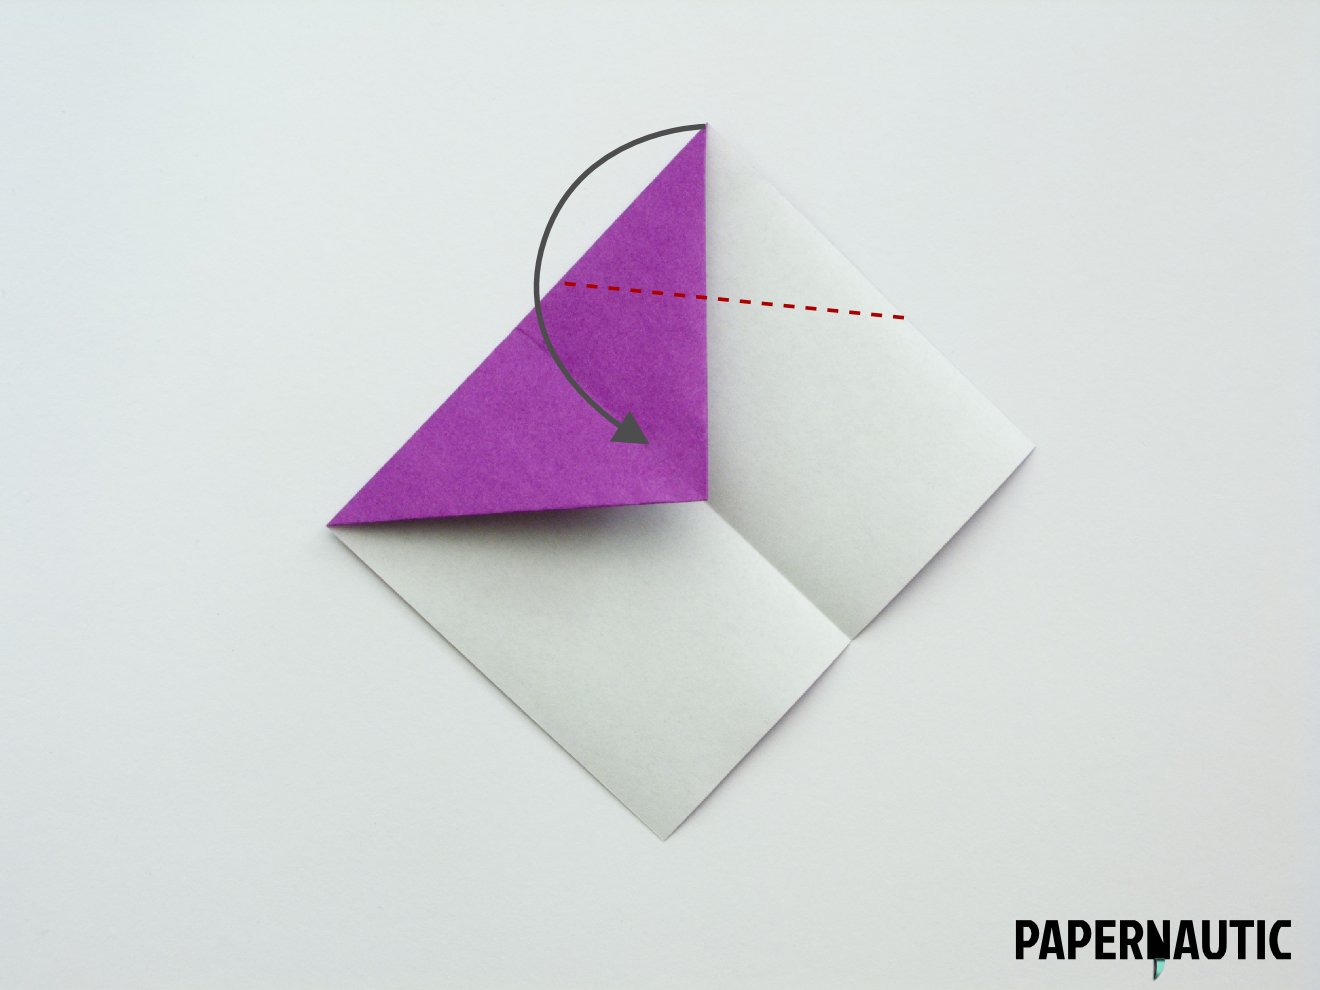
You now have a downward pointing triangle at the top of the sheet. Fold the top right corner to the central fold, about 1/3rd of the way up from the triangle’s lower point.
Step 5

Repeat that fold on the left side to keep it symmetrical and create the flat nose of the airplane model.
Step 6

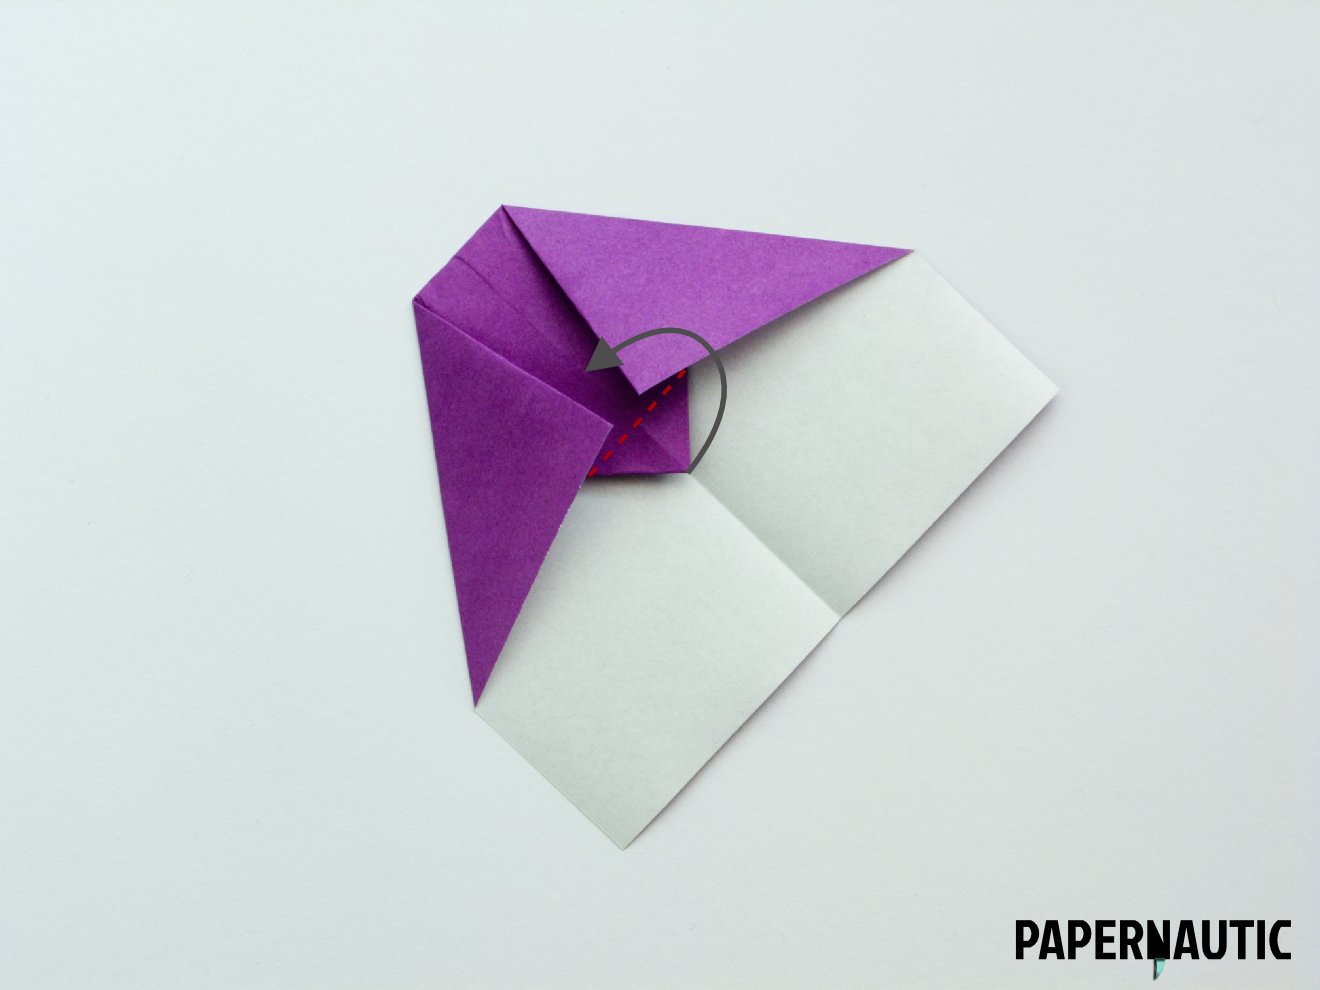
Fold up the bottom point of the triangle as shown, to seal in the loose flaps you have created along the central fold.
Step 7

The basic structure of the Gnat is ready and only the body and wings need to be formed out of the flat shape. Reverse the direction of the central crease, into what is often called a mountain fold. Everything you have been working with thus far, the sealed flaps and small triangle, will fold to be on the outside, so that the central crease rises up from the folding surface, relative to how we’ve been seeing it thus far.
Step 8

Now to fold down the wings. Look at the fold line shown and try to create a wing shape by folding it downward thus, dividing the flat nose on each half almost equally between wing and body. There is no precise design for this and different fold lines will give you varying results in flight. A wing size that’s only a little broader than the height of the body usually works best.
Step 9

Here you can see one wing formed. Now repeat the wing fold on the second side to create a symmetrical model.
Step 10

With both wings folded to a 90 degree angle from the body, you should be able to keep the model flat on its wings as shown, with the triangular flap on the top.

Your paper plane is now done and looks like this when it’s the right side up. To launch the Gnat, hold the triangular shape in the middle of the body between thumb and fore-finger, wings flat or in a slightly v-shaped formation, and push the Gnat into the air, horizontally or slightly upwards.
This paper plane has given me many many hours of enjoyment as a young child and a not so young adult, and it continues to do so at times. Try it out, experiment with the proportions of wings and body, and paper sizes, and most of all, do enjoy yourself and your skyward travels.
P.S. For a more personal take on The Gnat and my earliest childhood memories related to paper planes and how I came to love them, please read my article Cool Paper Airplanes and Warm Afternoons over on my personal blog.