Paper is a wonderful thing; So full of hope and possibility in its blankness. Those of us who write and draw know this, and so do those who dabble in crafting it into art, and toys, and objects of beauty and fascination.
The poster-child of these methods of making something out of a blank sheet, is origami and paper folding, but there are other basic ways, for the cut is as crucial a method of paper craft as is the crease.
I was interested in exploring a very specific type of cutting, a rhythmic, repetitive one, one that expands the possibilities of a paper surface well beyond what is possible with your unblemished sheet. One of the limitations of origami is its often hard-edged, geometric bias, which is why complex methods like wet-folding are used to make more organic forms.
Strangely enough, one of the ways to get past that limitation in paper’s physical nature is to give it many more straight edges. Transforming paper into a cut, or broken, articulated surface allows it to curve and twist in new ways and gives us new abstract and organic forms to breathe into paper surfaces.
Broken articulated surfaces, while a very accurate and technically descriptive phrase, makes less sense till you see one. I wondered where to start my exploration of this idea and I remembered a little trick that we learnt as kids, in science programmes and little booklets of magic tricks for children. It usually took the form of a challenge.
The walk through paper trick
In a single small sheet of paper, cut a hole which you can walk through.
As a child, my eyes would light up at this challenge. Is that even possible, to cut a hole in single sheet of paper from a notebook or writing pad which I could step through? The mind boggled.
As an adult, if you look at your A4 sheet of copy paper, you realise that even if you cut very close to the edge, leaving a rectangular frame a mere centimetre or two wide, stepping through the hole is impossible unless you are a very slight person and a world-class contortionist. The edges of the sheet of paper are your insurmountable limit. So the logical mystery then is how you can expand those edges to be a lot wider spread than they are.
This is where articulated surfaces come in because the only way to have a wide enough edge is to cut the paper so that all of it is pushed outwards to form the edge and this is how you do it.
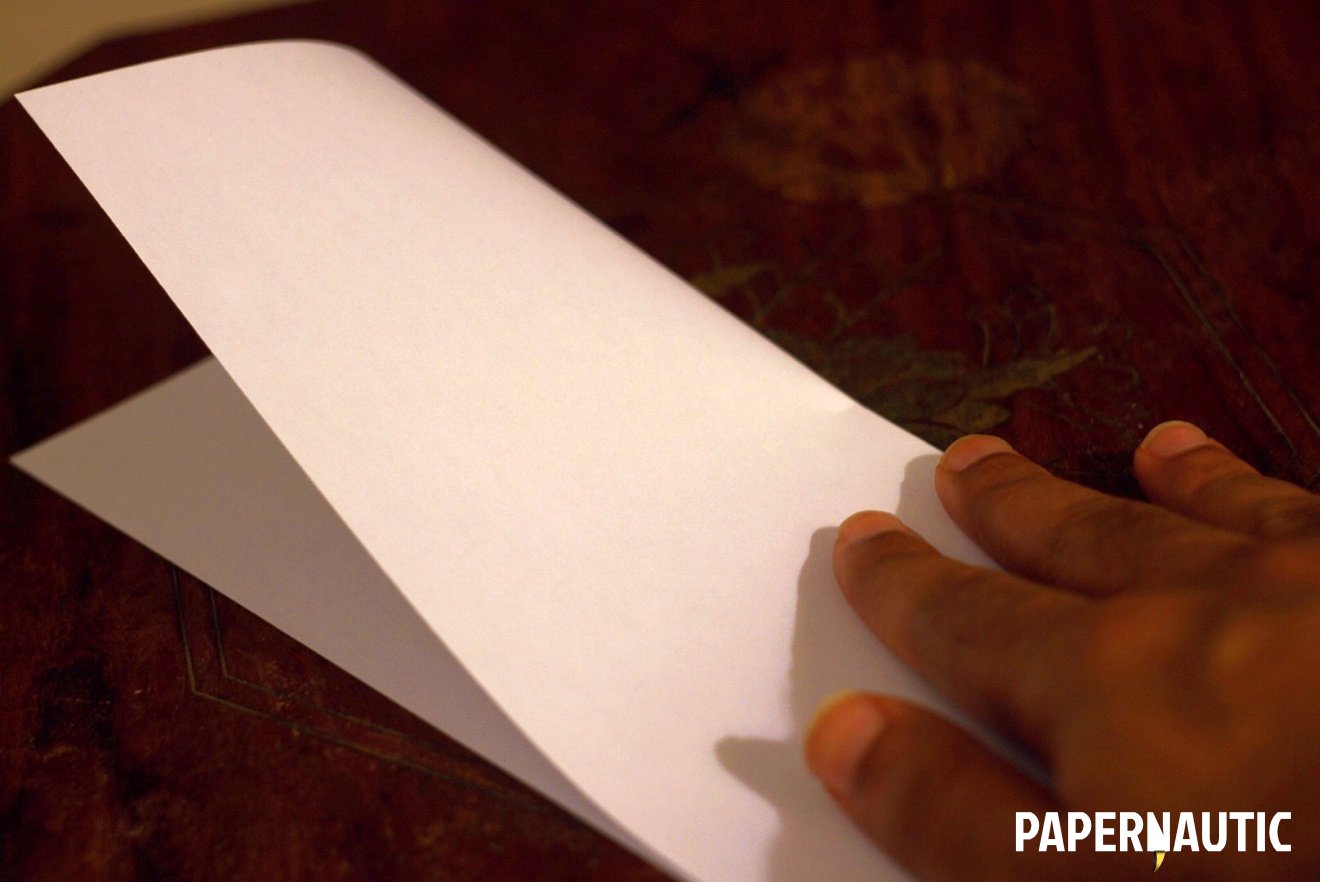
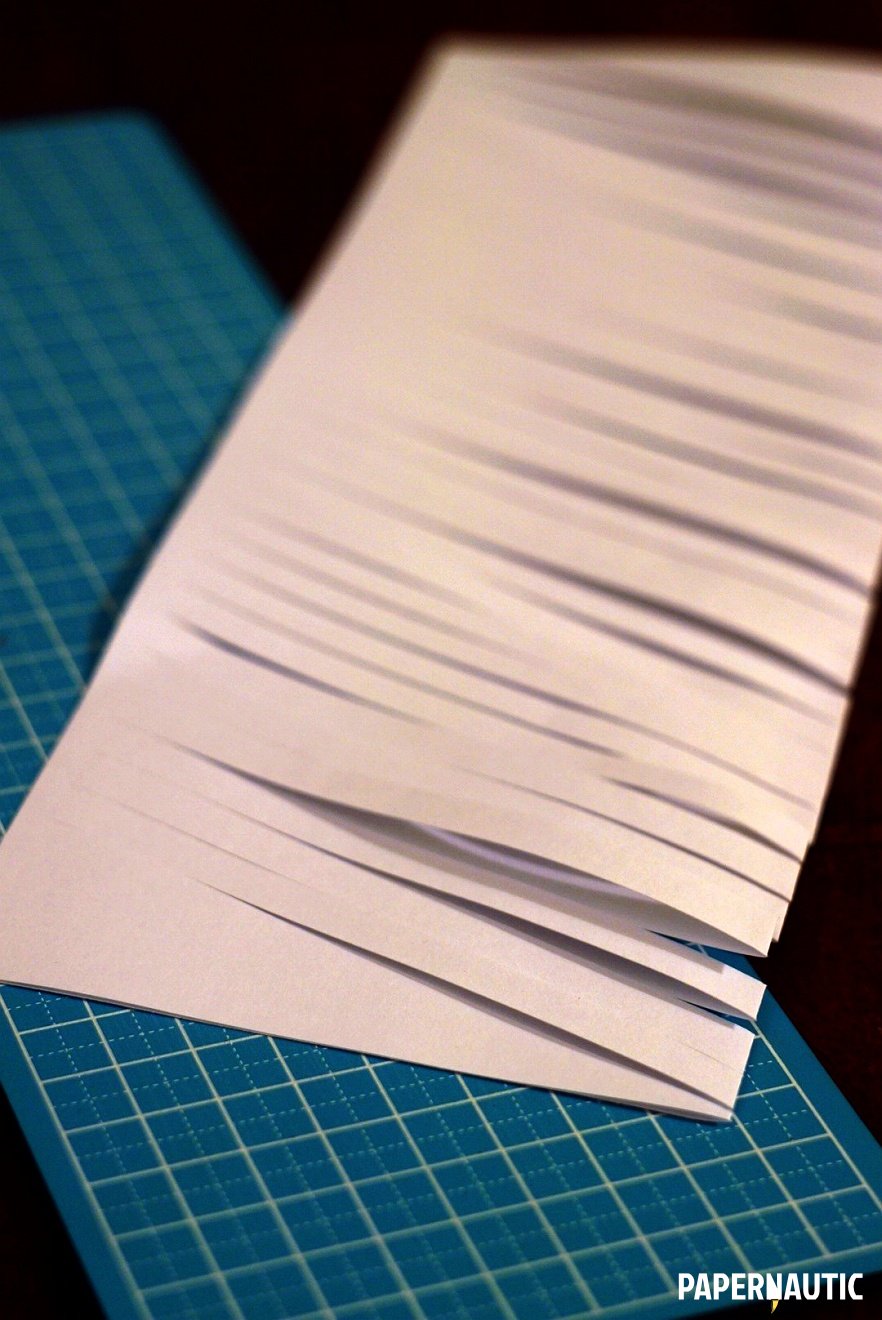
Start with a regular A4 sheet of copy paper and fold it in half along its length.
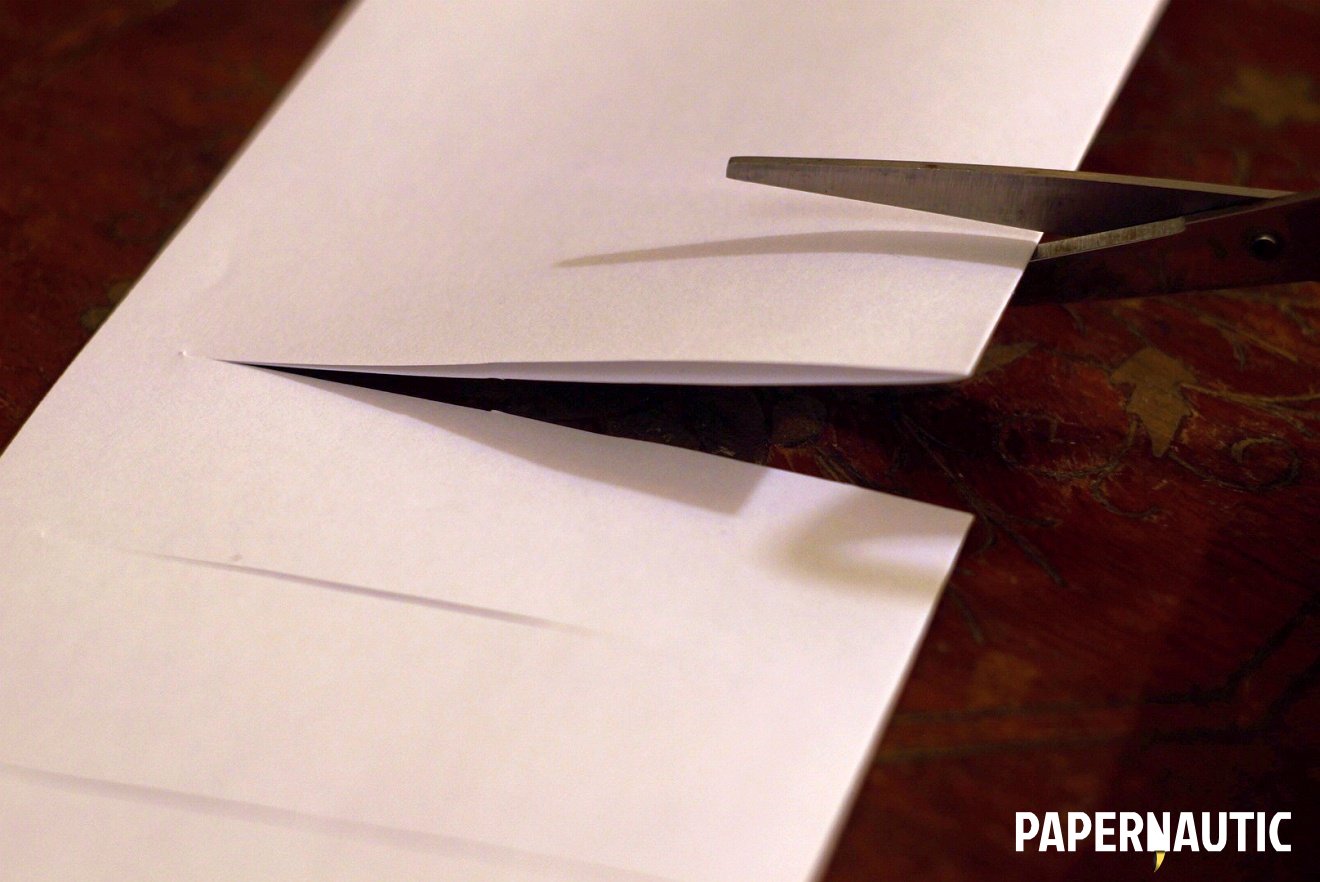
With a pair of scissors cut straight parallel cuts from the folded edge, almost to the other side, but not quite. Leave a bit of a distance from the edge so that you don’t cut up the sheet into separate strips. You want it to remain in one piece.
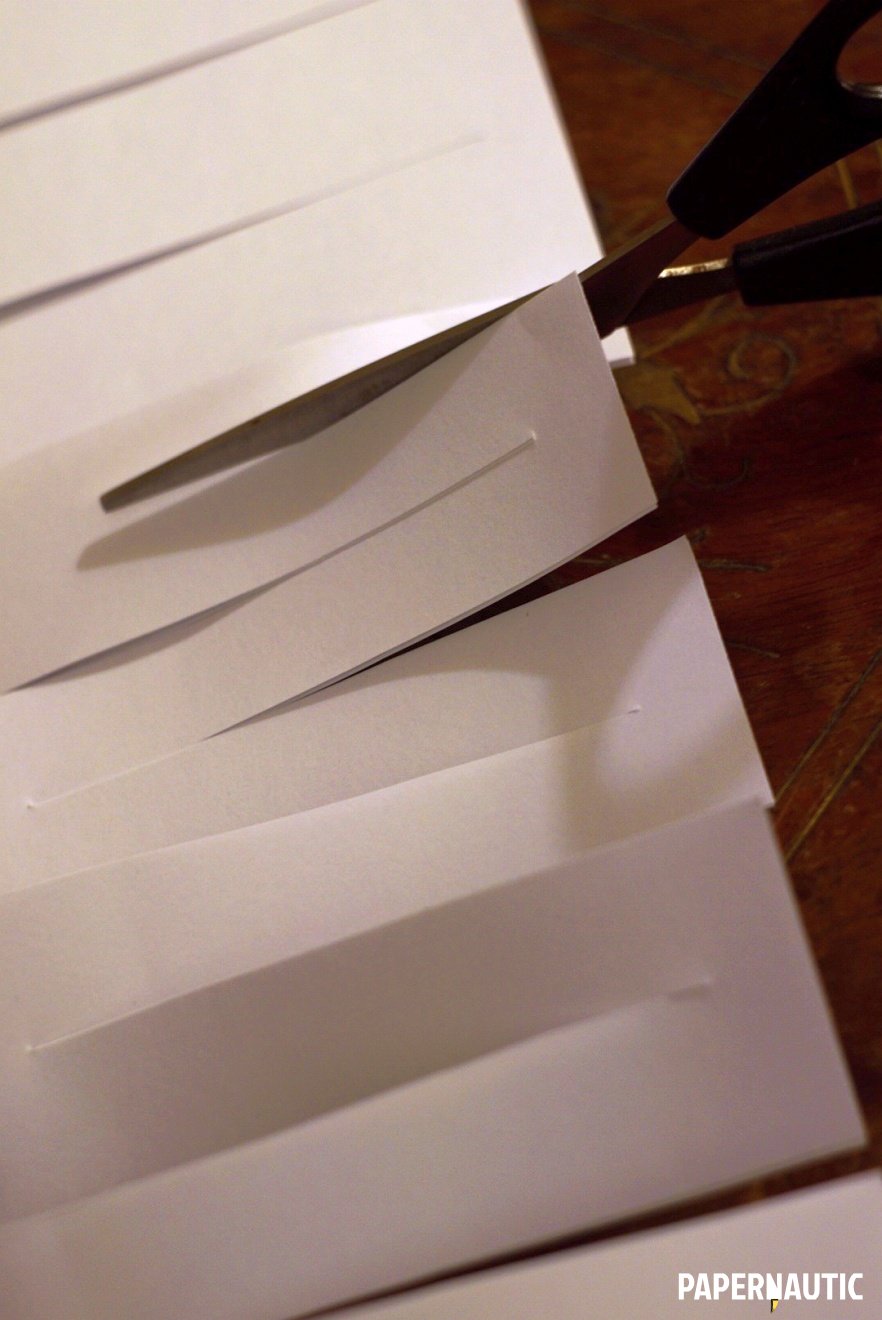
Turn the uncut edge of the sheet towards you and cut between the previous cuts from the loose edge toward the crease, once again leaving a distance at the end and not cutting through fully.
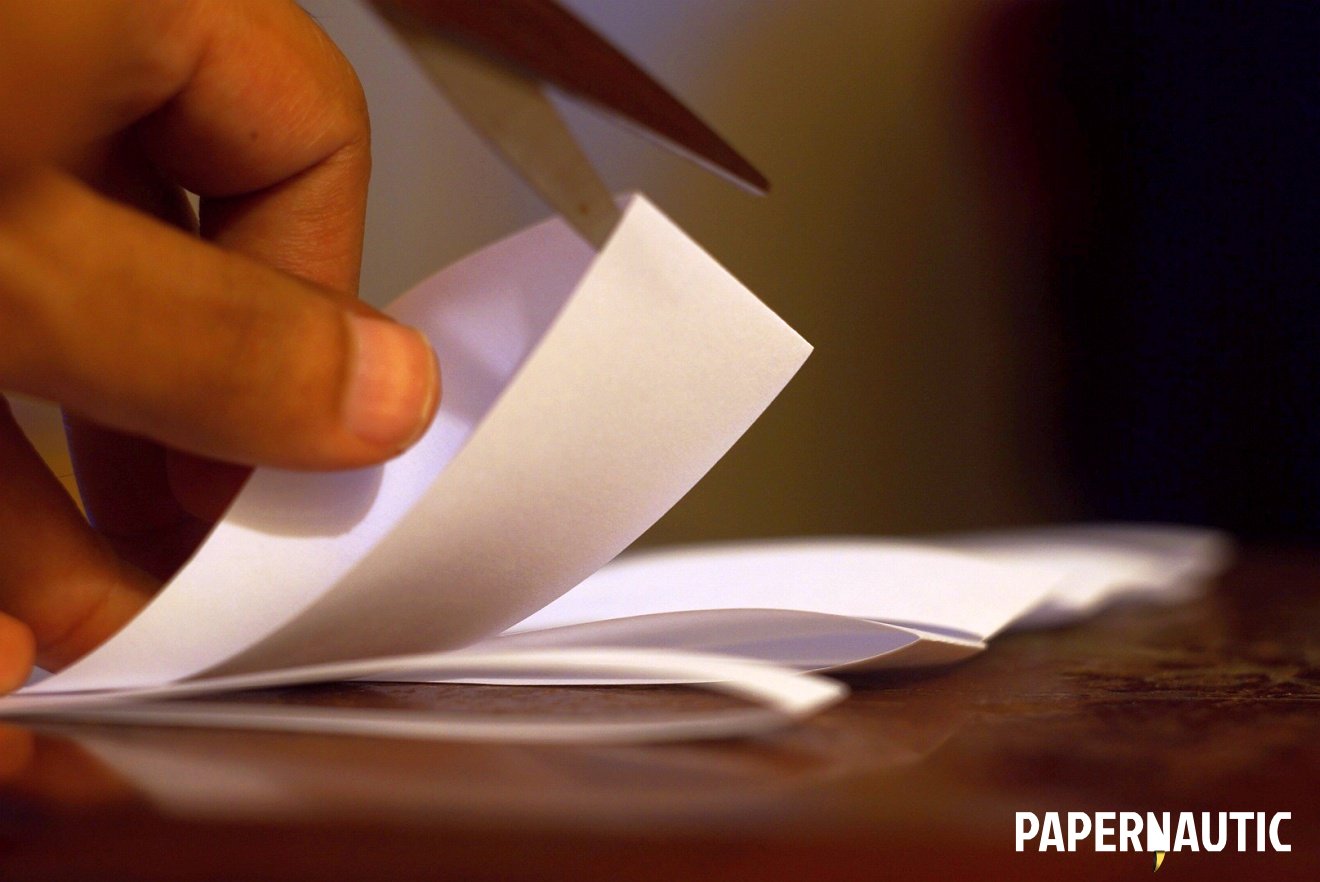
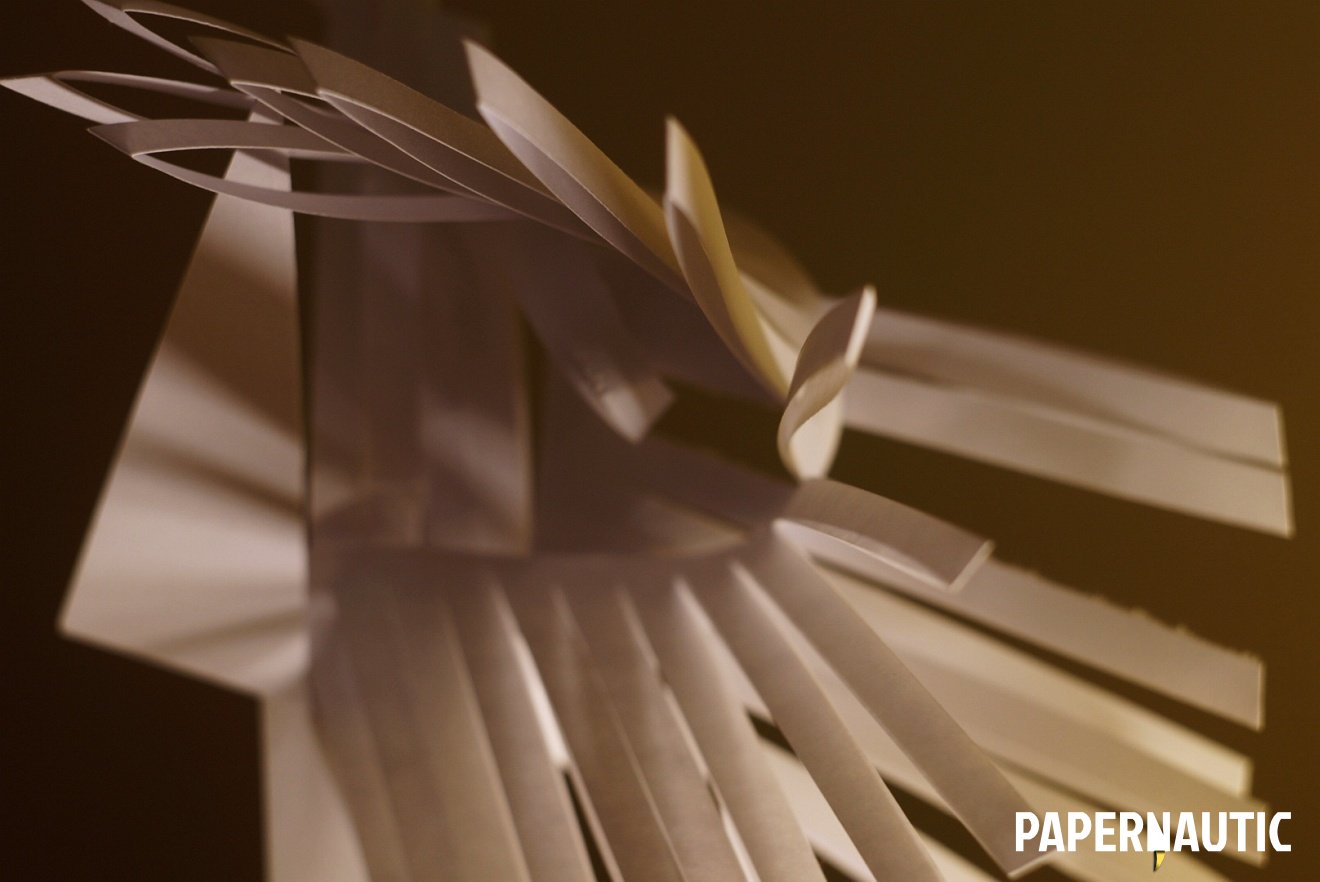
You now have a series of folded strips or loops along the folded edge of the sheet. Leaving the first and last one at the ends untouched, cut these loops along the folded edge so that they form two free edges.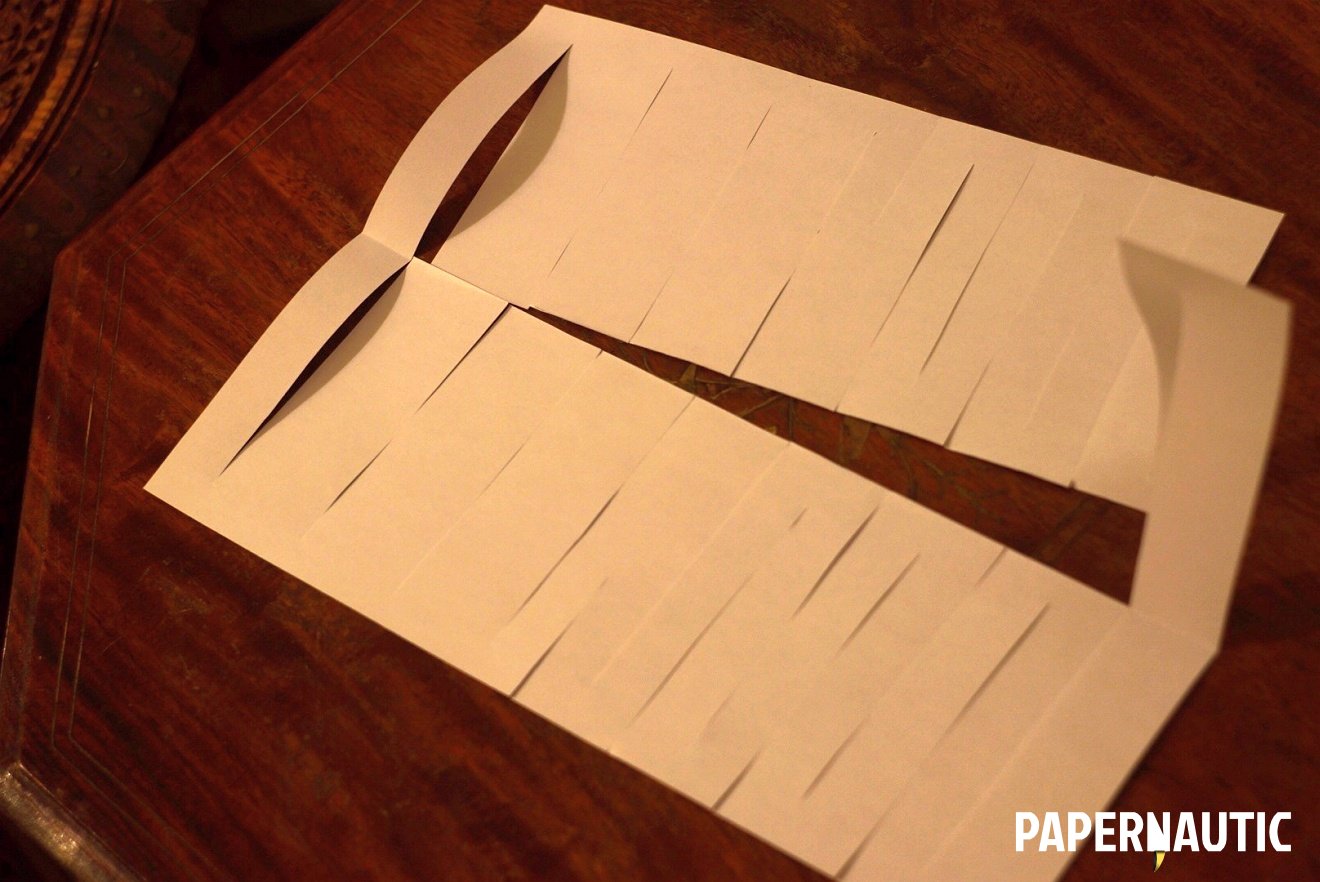
Now unfold the sheet and you should have something like this. The long central cut in the middle combined with the continuous zig-zag of paper forms a continuous long chain.
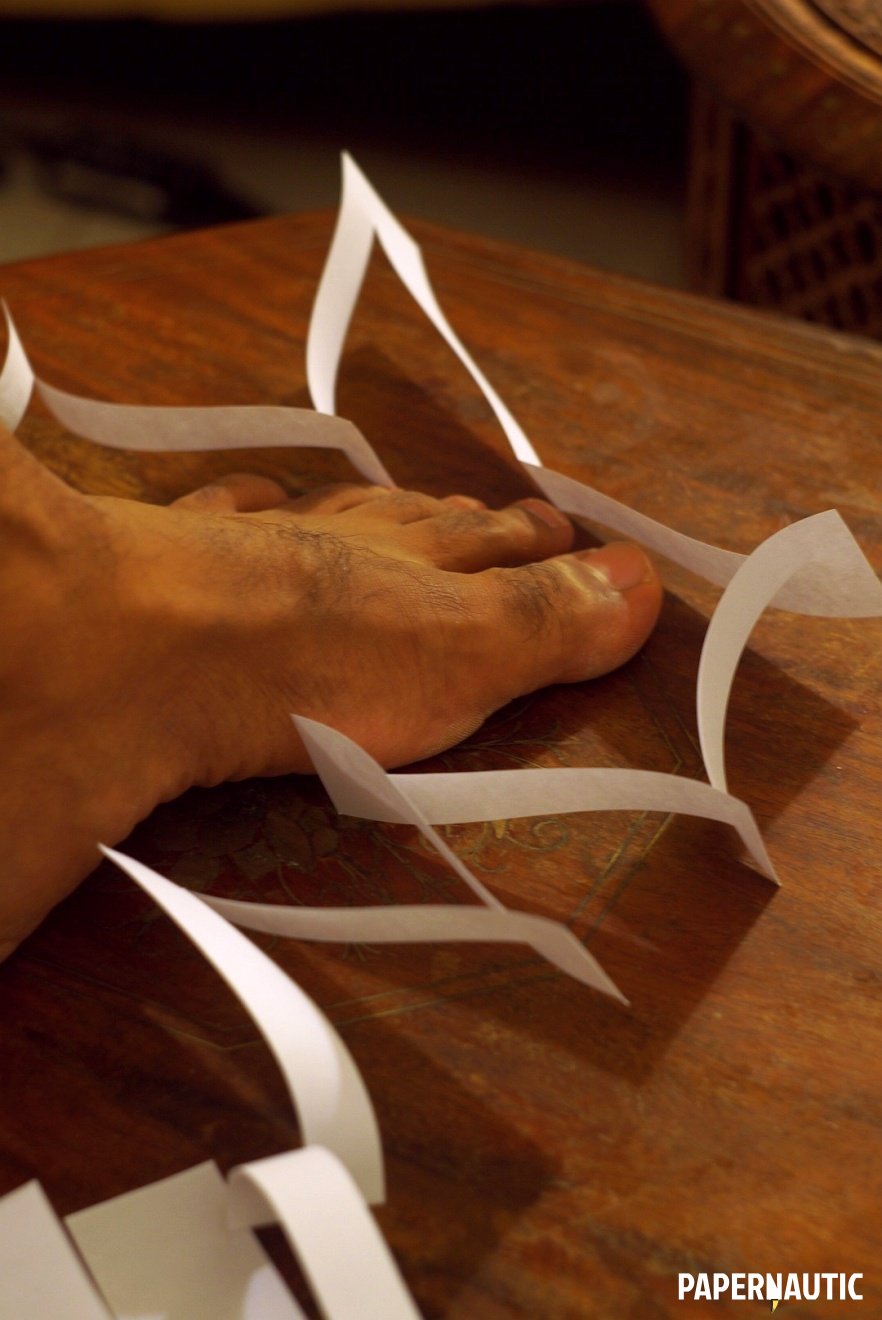
Pull it apart and you will find that you can indeed step through the gaping hole you’ve just formed by making this long paper loop.

Step back and look at what you’ve just created. It is a large, looped paper chain, made of a single sheet of paper. More importantly, it’s not a tradition type of chain, with separate pieces. It is actually a single surface, the very same single surface you started with in your sheet of paper. Only now that surface fas been cut and broken apart into connected parts that can move independently to some extent, and so you they have articulated the paper surface.
Congratulations! You have just created your first broken articulated surface, and walked through a sheet of paper.
Distortion
Now that you’ve been introduced to broken articulated surfaces, lets explore them further and see why we need them. Paper without modification is very flexible but limited to the very strict surface it forms. You can twist and curve to some extent, but no further, as you can see here.

Unless you want to fold it, you can roll up paper but do very little beyond that in the realm of curved forms and distortions. To really distort the shape and surface of paper, of which we have just seen a an extreme example, we need to break and articulate the surface to have it bend to our needs more freely. Walking through a loose garland of paper is one thing but what sort of real three dimensional forms can we create with broken surfaces? Let’s take a look at some.
Pinwheel
There’s another children’s toy at the other end of the articulation spectrum which shows the form-sculpting possibilities of a cut paper surface. The pinwheel is a true classic. Something basic and rudimentary that still keeps kids today entertained. It is not articulated in the extreme but uses repeated cuts to form paper into a new and useful shape, so let’s make one.

Fold a square sheet lightly along the diagonals, as a guide and to find the centre of the square.

Cut from the corners till around halfway to the centre along the diagonals, as shown. It creates two flaps at each corner of the square and your very minimal broken articulated surface is ready to be formed into something more.

Lift and curve the alternating flaps at the corners towards the centre of the square and fasten them all there by sticking a pin through all of them stacked together. Here I’ve used a toothpick, but if you use a pin with sufficient head, it will hold all four flaps in place and the pin can be stuck at the back into a stick. This little toy will happily rotate in a breeze; A simple thing of beauty.
The pinwheel is not the most articulated surface but still shows you what unique forms can be created by cutting the surface into repeated and connected elements. Articulated surfaces with more striated, parallel cuts have a lot more to offer though, so let’s look at some of those.
Paper lantern surface
The classic paper lantern uses an articulated surface with parallel cuts as its main form. A length of paper with vertical slits, rolled into a cylindrical shape allows the slits to expand as the flexible paper strips between them bulge out, to let light out from within. While we’re not making a lantern here, let’s create a similar surface to see how it distorts.
I started with the narrow strip of paper that was left over from making a square for the pinwheel out of an A4 sheet. A longer, narrower piece of paper allows more space to curl and twist the surface into new forms, making it ideal for such experiments.

The method here is the same as we used in the walking through paper piece above. Fold the sheet in half along the length and cut partially from the folded edge towards the other edge in many parallel cuts. Still folded, the sheet can form a fanning out series of loops as shown above, which is quite the attractive form itself.

Unfolded, you can see the parallel slits, all contained within the edges of the paper, and this is our surface to play with.
In keeping with the lantern example, I twisted the now articulated sheet into a near-cylindrical shape and you can see how much more interesting and sculptural this is compared to the normal sheet of paper curved similarly, which we saw at the beginning of this section. The paper lantern surface has a lot of potential.
Relief surface
To test some of that potential, let’s play with what we’ve made some more. So far we’ve left the paper surface itself quite flat, treating all the created articulated strips evenly. But what happens if we made the surface itself three-dimensional?

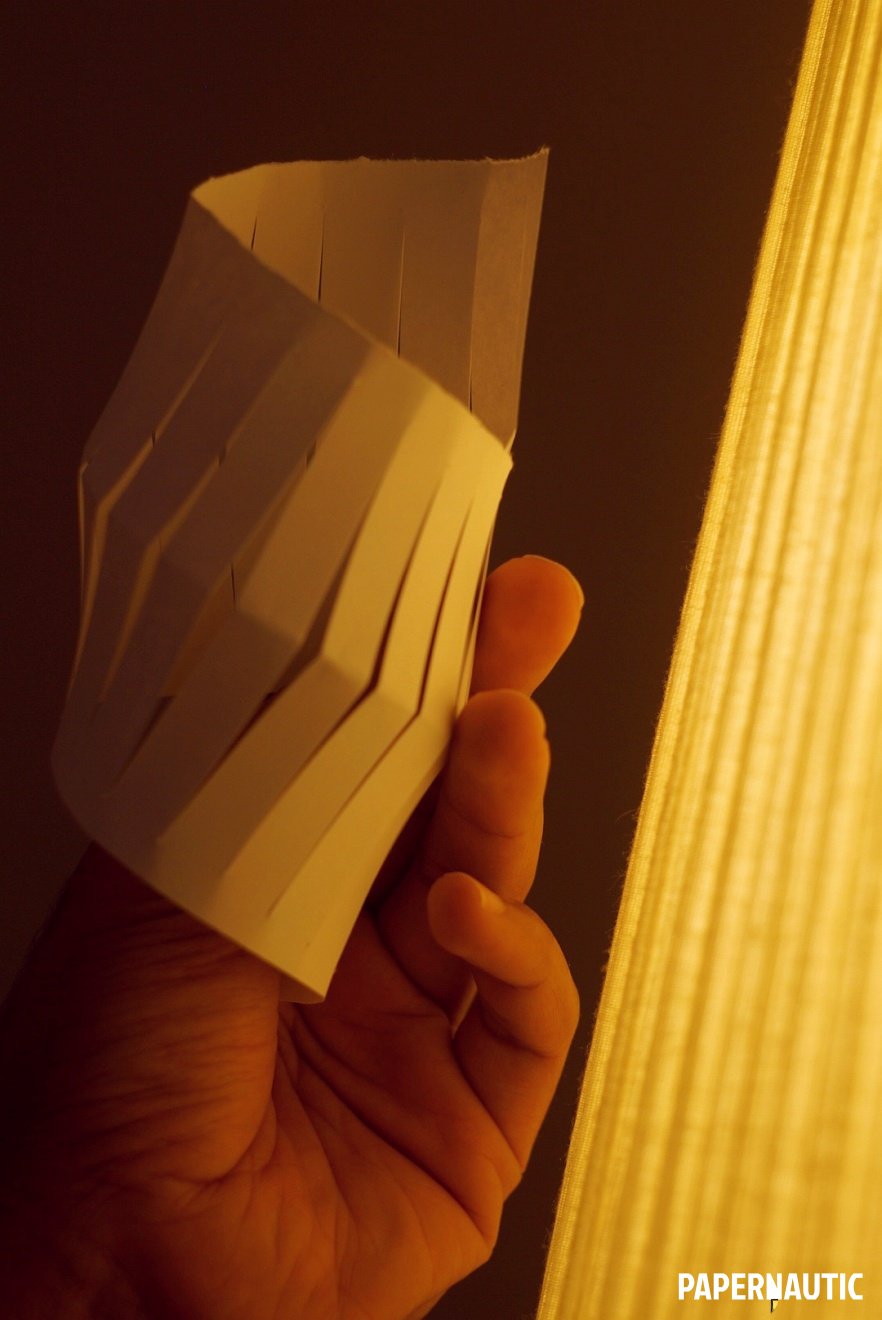
The cut sheet from the lantern shape above had all the strips evenly creased in a single direction along the middle. Here I folded the alternate strips in the opposite direction, and as you can see, the flat surface is not so flat any more and is much more complex.

Curved towards a cylindrical form this is how it appears from above. As you can see, the alternative strips folded inward and outward make this a more rigid and stronger structure than the original lamp surface.

This form stands on its own by the strength of its construction, and would not only make an interesting lantern but can form the start of so many more complex structures. Distorting broken articulated surfaces obviously has a lot of potential for practical structure and play.
Extrusion
We’ve just seen how we can craft an articulated surface into the third dimension even before any distortion is attempted. This is an important lesson that opens up further possibilities. Even if we think back to the original experiment of walking through paper, you will realise, that the sheet of paper doesn’t merely expand in a flat way.
After all the cutting is done, if you held that sheet at one end, the rest of the cut pattern will literally fall downwards to form the large chain we’ve seen. The cuts and articulations in that case allow the sheet to naturally fall into the third dimension and that is an exciting idea in abstract.
Moving a flat shape into the third dimension to form a three-dimensional structure is called extrusion. What if we could do that with cut paper? We actually can and we must return to another childhood paper craft staple to realise that. Let’s create another simple paper chain.
Single piece paper chain
The single piece paper chain is another one of those tricks that fascinates children no end, because the effort put into it seems small compared to the ethereal looking thing that results, almost automatically.

Start with a square sheet and fold it in half along a diagonal to form a large triangle. Fold that triangle in half again to create a smaller triangle, which is a quarter of the original square.

Along the folded edge of the small triangle, where all four folded layers of the square meet, use a scissor to make broad partial cuts, as with all the examples we’ve done thus far, not cutting completely to the edge. The cuts must be parallel to the longest side of the triangle, which is the edge of the original square.
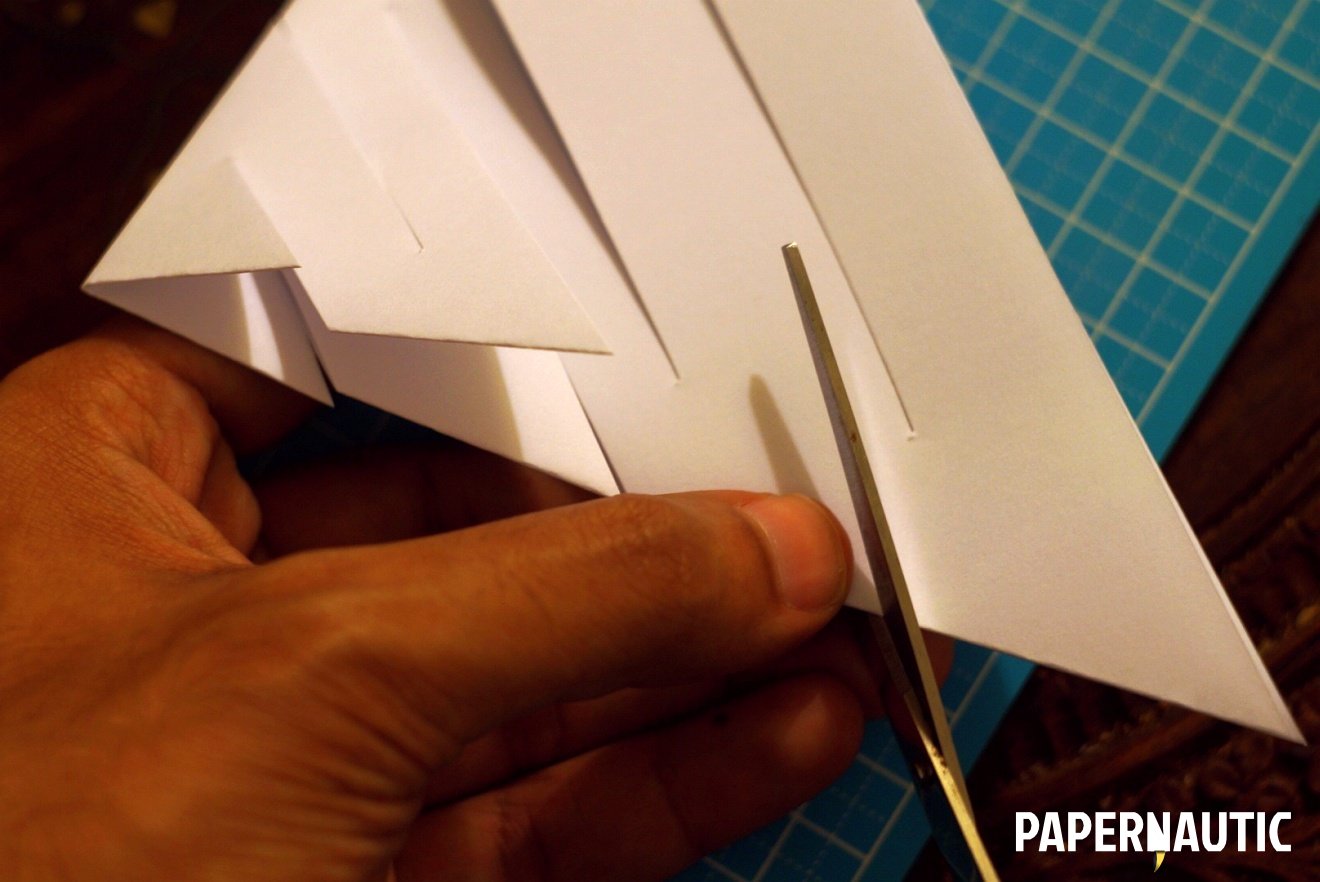
Now turn the triangle around and make more partial parallel cuts from the other side, between the ones you just made.
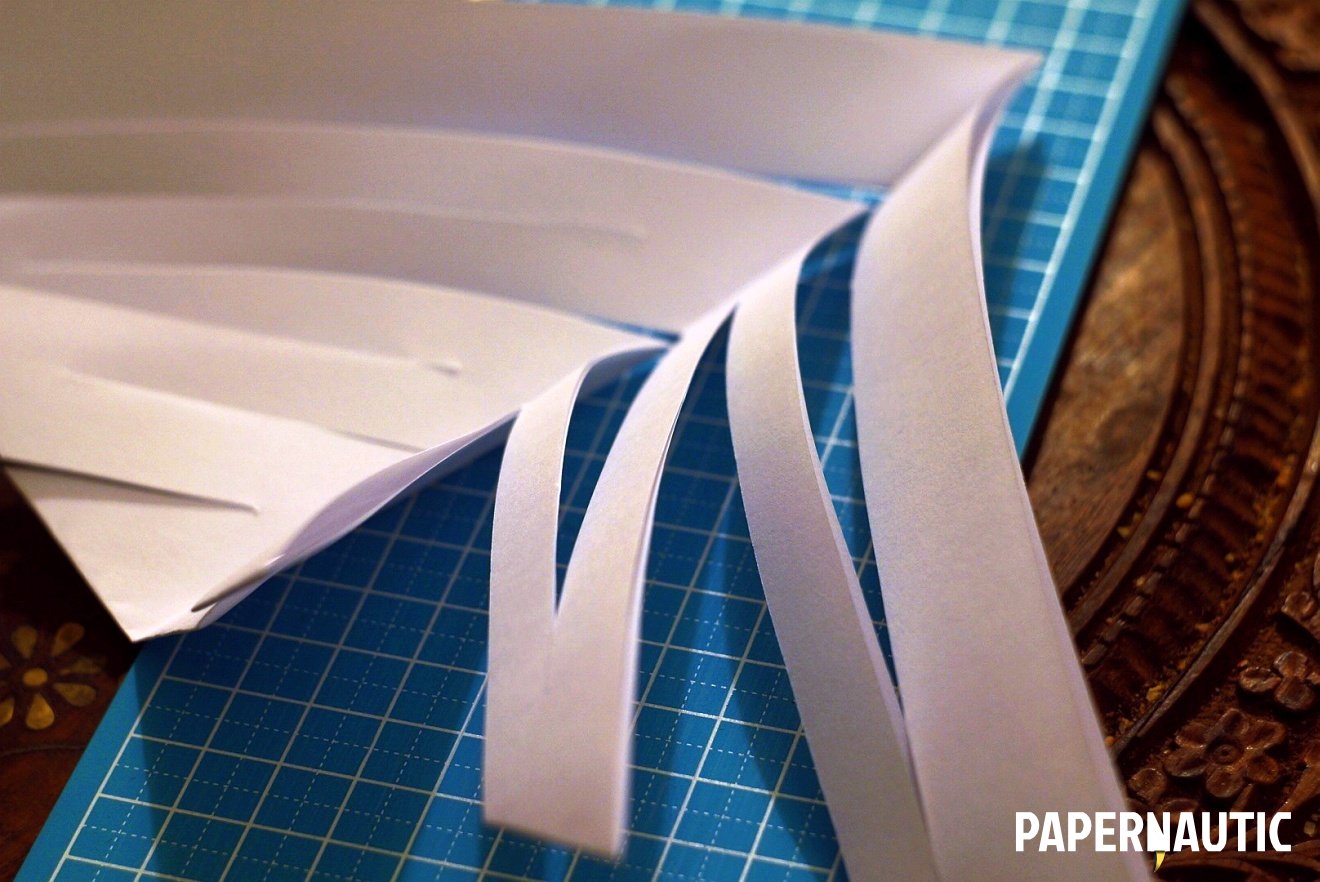
That’s actually all the work there is to do. When you unfold the small triangle into the larger triangle you will find these beautiful zig-zag curved forms.
Unfold the square completely, with the major diagonal fold peaking upwards as shown. Toward the centre of the square, you should find some triangular flaps which you can fold up to form something to hold on to. Now hold on to those triangles and lift your piece up and see how it falls.
If all the cutting has been clean and clear, the extruded paper chain you now have is quite beautiful. And remember that we did nothing but make cuts in paper and let it fall into the third dimension.
This chain has a lot of detail and the shapes vary depending on the length of the cuts and the stiffness of the paper. Flexible paper leads to more pleasing curved shapes and they can even be pulled apart more actively to create more severely curved shapes
Extruded paper sculpture
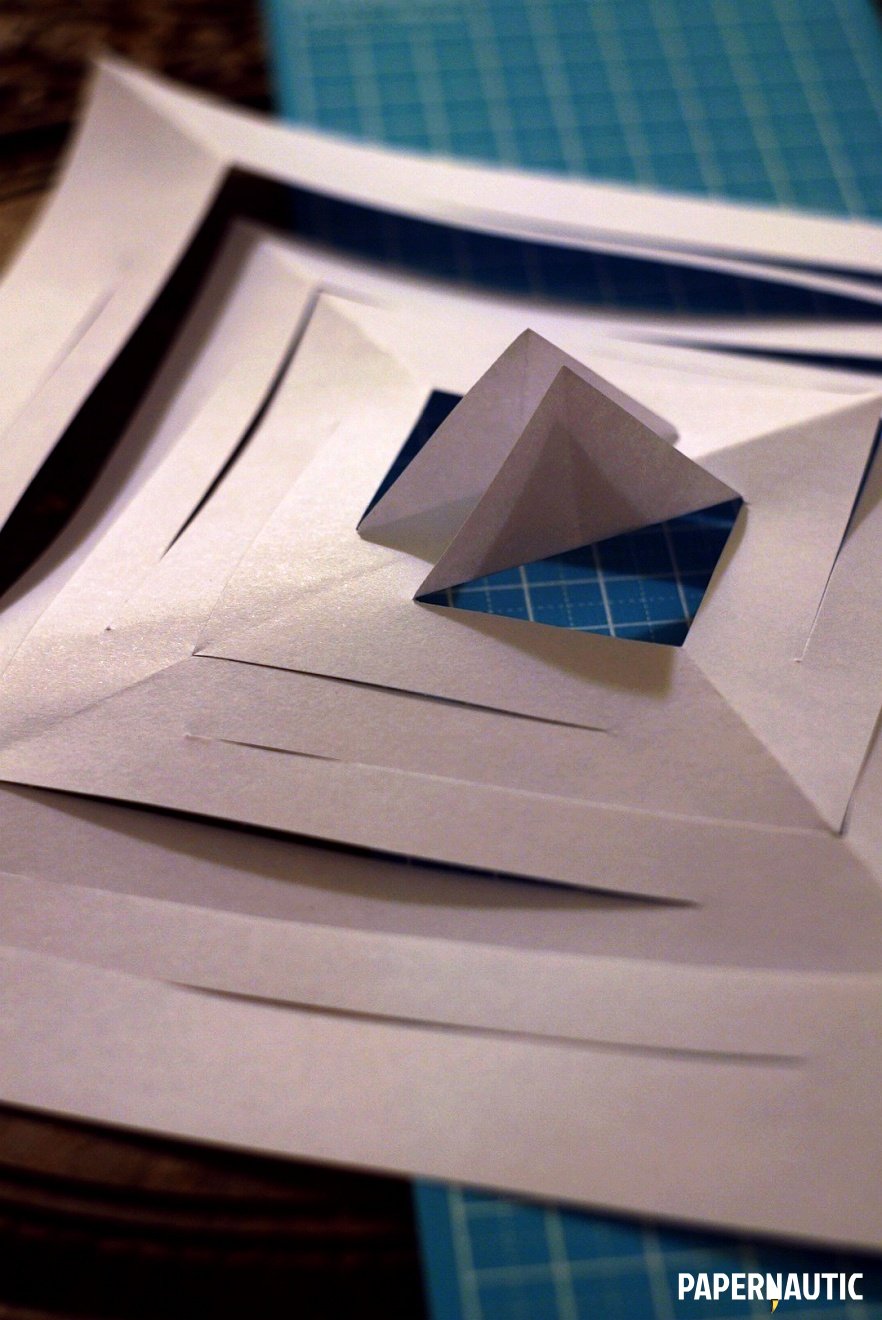
The paper chain we just tried gives us a good general method of thinking about extruding articulated paper surfaces. For more experiments in the same direction, I tried starting with a smaller square of paper and folding it into eights before cutting it, instead of the quarters used above.

The cuts I made into this more tightly folded square were also at a bit of a slant to the edge of the square, to see how that affects the final form. As you can see above, unfolded, it looks similar to the chain but more complex.

Being made of a smaller piece of paper and hence more rigid, this one needed to be pulled apart to create depth and here you can see the pattern of concentric shapes it forms as it hollows out.

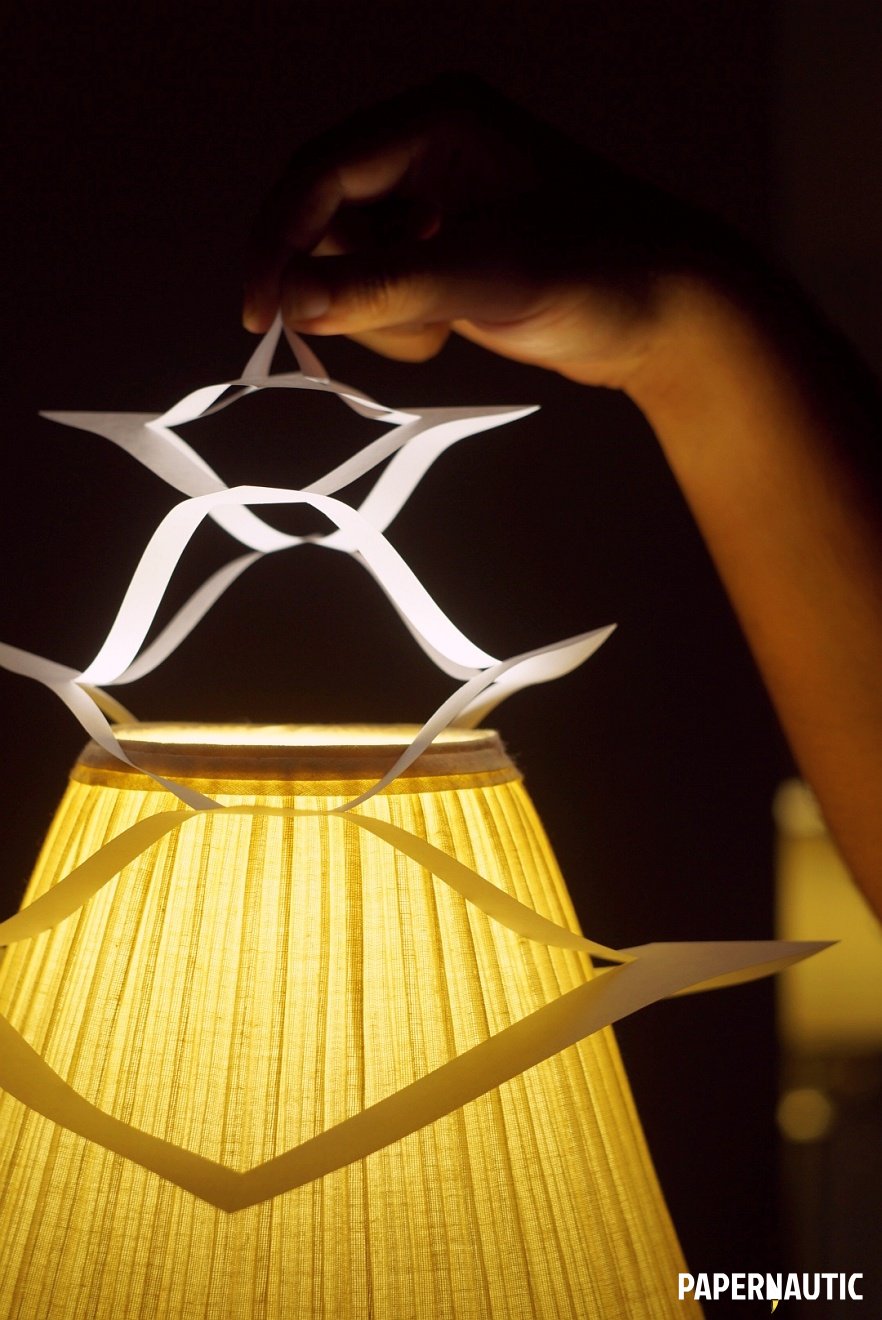
Held under a light here, you can see just how many sharp little points and folds it can form, making for a fairly strong structure.

This extruded articulated surface is more sculpture than mere paper chain and shows the potential for such techniques to create both beautiful and practical shapes in craft. Creating things like this with stiffer paper and some more design thought is bound to lead you in fascinating directions.
Contortion
Thus far, we’ve been very orderly and geometric in our exploration of broken articulated paper surfaces, but now that we are familiar with them, it is time to play a little more with their abstract potential.

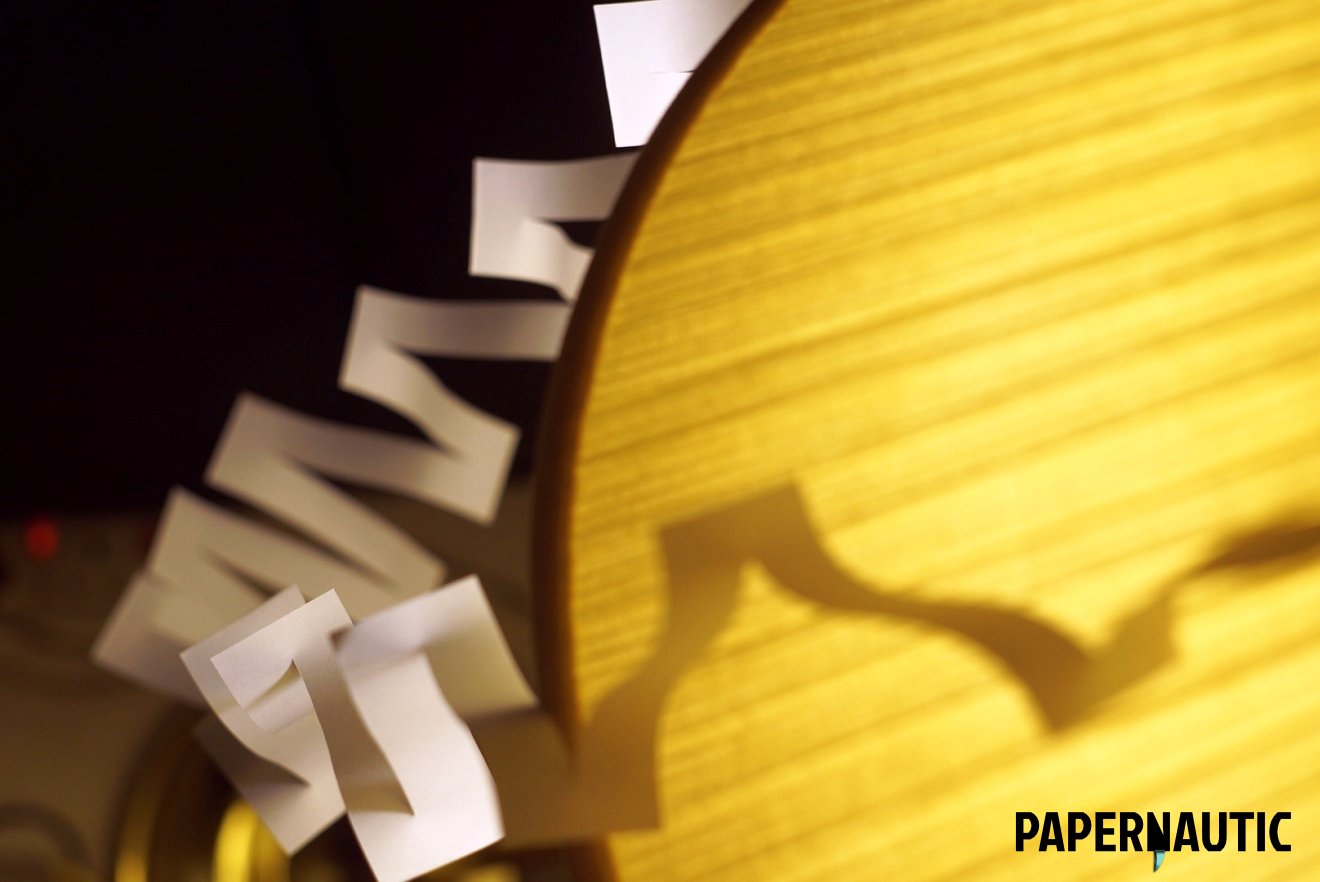
I started this piece with the walking through paper trick because it truly does encompass, in minor ways, all the potential that such surfaces hold. Sure you can step through the hole you created with that piece but you would be wise to also pay attention to some of the beautiful shapes it creates when twisted and contorted into impractical forms.

Even here, jumbled up into a pile on a table, the loose paper chain forms structures and shapes that are beautifully organic and architectural. So let’s play with this a bit more.

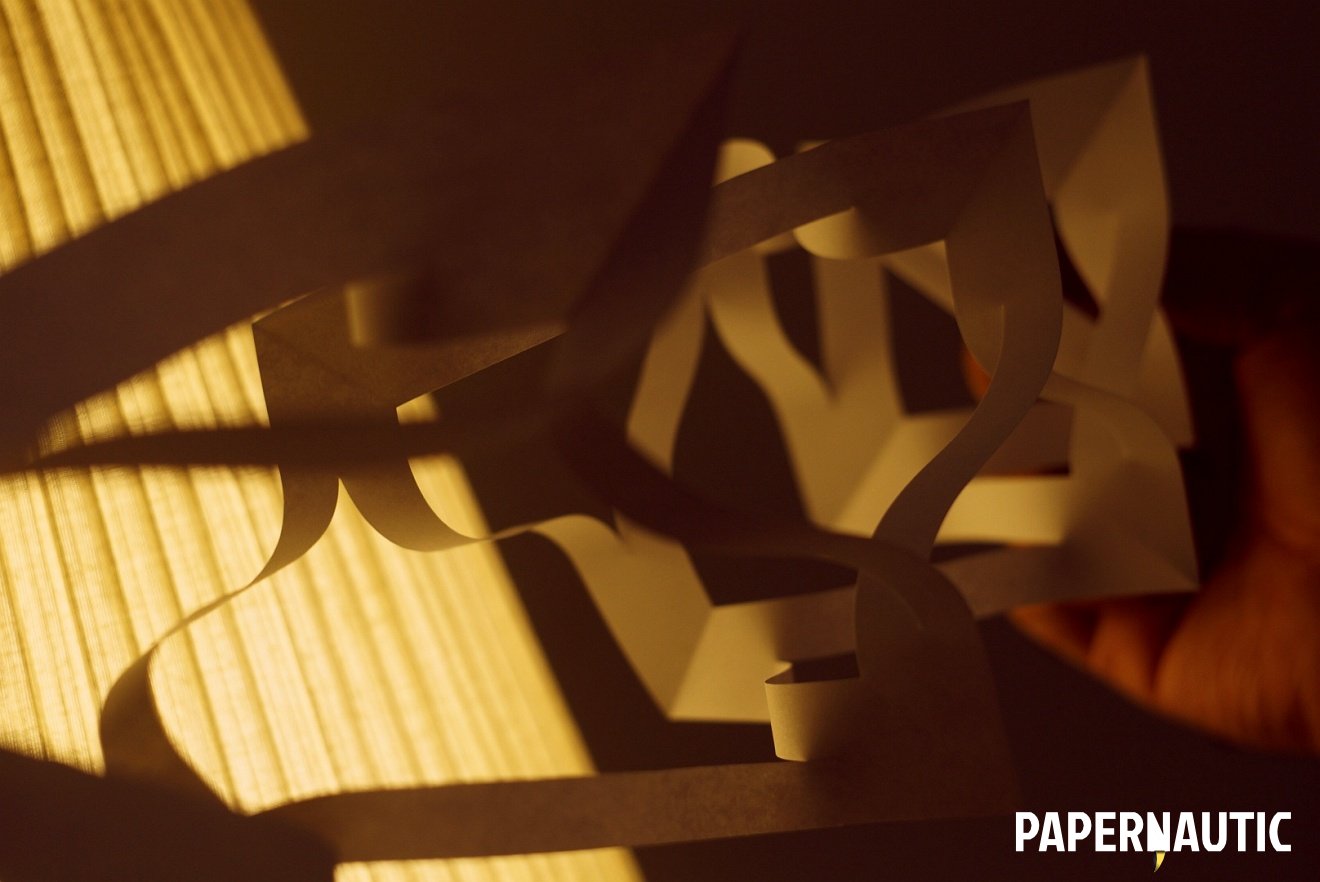
Start with the usual A4 sheet folded in half along its length, which you are familiar with by now. Instead of using a scissor to make broad perpendicular cuts along the folded edge, I made narrow slanted cuts using a craft knife.
What results is a much more finely articulated piece of paper with strange triangular bits at the end. You could unfold this and see what potential that holds, but considering the narrow strips, I thought the fold gave it more strength and so played with what I could do by distorting and contorting the surface as it is.

After curving, curling, twisting and inserting some loops through others to form a complex knotted form, this is what I ended up with. Again, that distinctly architectural sense of it does come back into view.

By being more chaotic with both the articulations and the contortions we put it through, the surface forms shapes and structures which are both organic and geometric, and extremely beautiful when seen close up like this.
Contorting broken articulated surfaces clearly has infinite potential as play and as a sort of three dimensional sketching, searching out useful and beautiful shapes and ideas of forms hidden in a simple sheet of paper.
This article was above all meant to be an exploration into the possibilities of cutting paper to create these articulated surfaces and we’ve looked into many different ways they can be used to create interesting shapes and objects. But even more so, this has been an introduction, to show you just enough so that you can play and experiment with this yourself. It doesn’t take much, as you’ve seen, a sheet of paper and something to cut with.
We’ve started with things most children learn to do, which makes an easy and gentle introduction, but imagine the potential of more complex experiments in similar directions. You now have the building blocks, the simple pieces, and you can put them together and build them up into much more beautiful, useful and transcendental objects made of paper.
I hope you do.